
Fixing the sticking button on my Logitech G7.
So I've, had a first edition Logitech G7 for a number of years and what a great mouse. Unfortunately a few years ago the left click button started sticking, and performing a rapid double click within whatever software I was using. This more or less negated my ability to single click on anything; desktop icons were double clicked, web-forms were submitted by accident...etc. It made the mouse unusable. I never got around to fixing the mouse, and set it aside. Today I finally decided to right this wrong and fix my old mouse. I found a great guide on the overclockers forum here, but following that guide I found my leaf spring to be ruined and un-fixable.
Thus I am now forced to replace the "clicky" switch entirely, and figured there might be some others out there in my situation that could use an example. After taking apart the mouse, (there are four screws on the bottom, one of which requires you to break the warranty sticker, the other three may cause you to damage the non-stick pads...please be careful and proceed at your own risk) and running through the steps in the aforementioned guide, I realized I had to remove and replace the switch.
My parts area had a huge number of random switches but I did not have the correct three pin 5mm momentary mouse button switch laying around in my parts box, I found an old PS2 mouse, ripped it open and was pleased to find that it had two of the exact switches I was looking for!

The logictech G7 needs 3 pin switches, so make sure your donor mouse has 3 pin switches. You will need a soldering iron, and either copper braided de-solder wick or a solder sucker. I am going to assume you know how to solder and de-solder, if not there are many wonderful guides out there on the internet. Flip the circuit board for the donor mouse over and locate the solder points for one of the switches:

Once you locate the solder pads for one of the switches, remove the switch with your soldering iron and de-soldering tools. Be careful not to overheat the metal on the pins which could cause them to pull out of the plastic switch thus ruining your day (and your mouse).
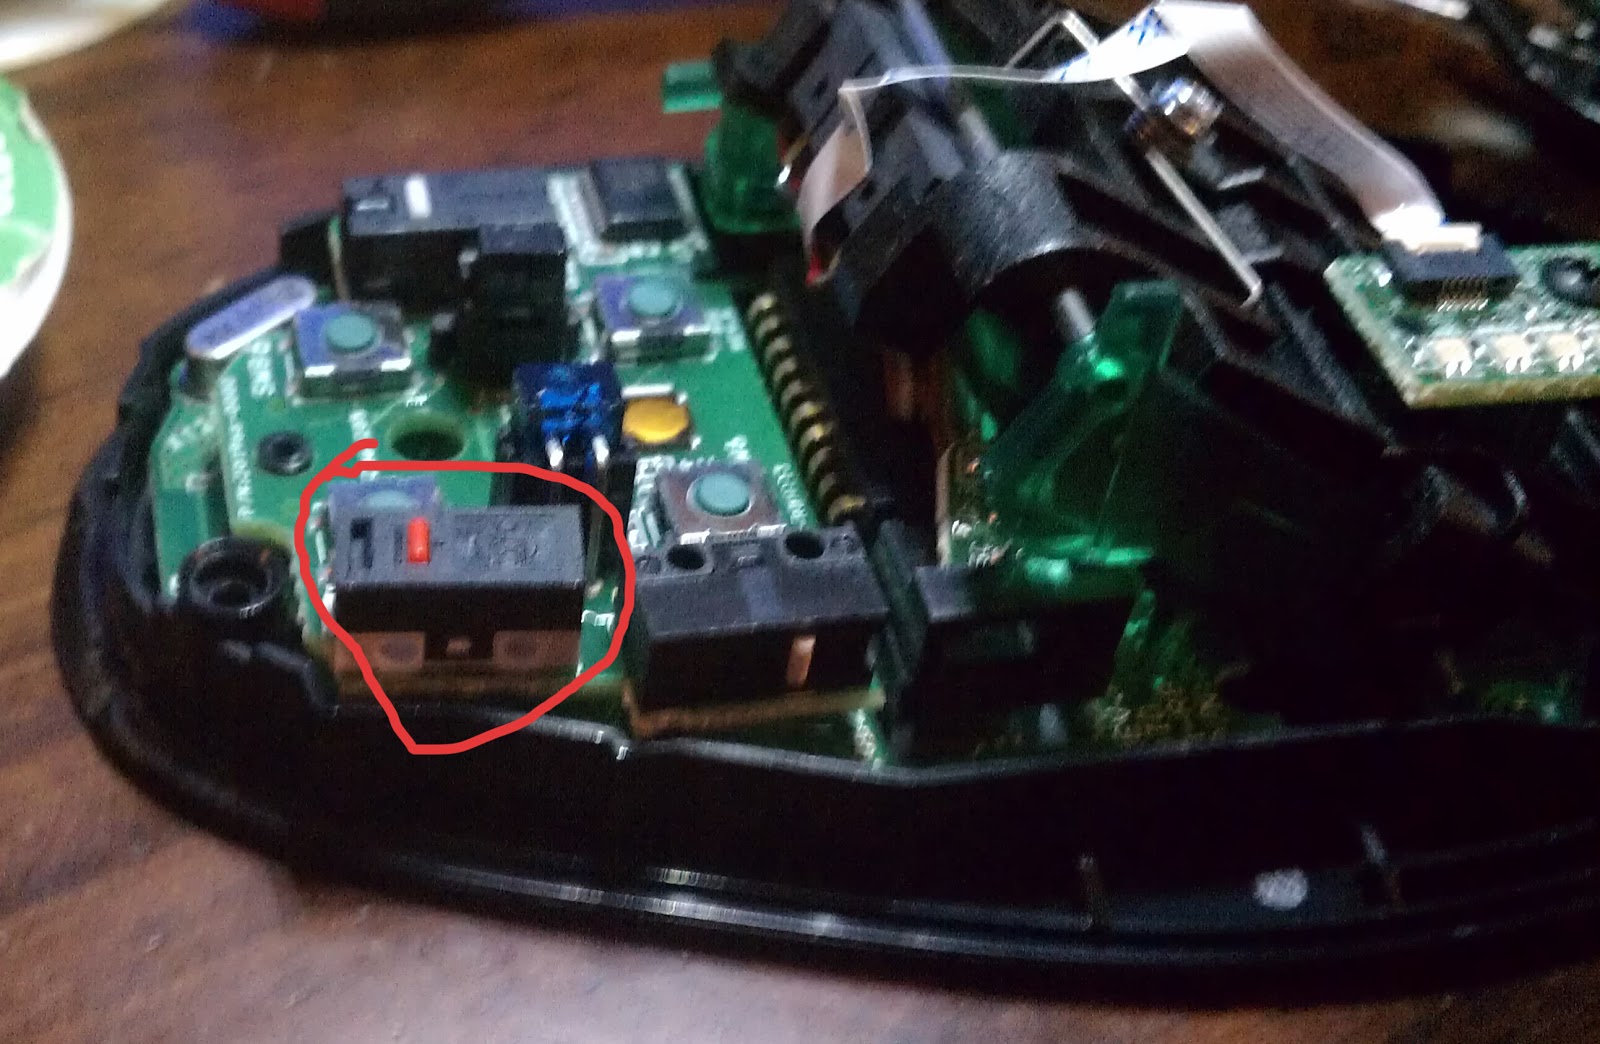
Next you will need to de-solder the broken switch from the logitech G7, which is actually pretty tricky due to the way that the circuit board the switch is attached to is located. Here, Ill show you:

As you can see, there are two circuit boards with a small gap in-between them. On the opposite side of the mouse by the right click button there is an 8 pin jumper that connects the two boards. At first, I thought that the jumper might have been a pin and socket setup where I could pull them apart, but alas, it is soldered on. If you are careful, and have a good fine tip soldering iron you can actually de-solder the broken switch without separating the boards. If you do not have those skills however, you will have to de-solder the jumper in order to separate the boards.
Assuming that you can access the switch without taking the boards apart, you will need to de-solder three pins on the Logitech G7 board:

Once removed, the board should be clean and the holes should be clean and free of solder. Make sure no traces were cut or lifted off the board. Once again, if you dont know how to de-solder you may want to ask a friend for help so that you dont ruin your G7.

Assuming you reached this step with me, take your donor switch you removed from a donor mouse earlier and place it into the holes in the G7 circuit board, and verify that it fits flush against the circuit board. If the switch does not fit flush, do not force it. Find a switch that will fit flush. You should also check that the "clicky" button on the new switch matches the same location as the old switch. Hold it up against the right click button to verify this, or the G7 will not work properly. Once you have verified that the switch is a match and fits, solder it back into place:
At this point is a decent idea to throw the battery back into the mouse and just verify that your soldering job did the trick and the computer will register the left mouse clicks. If everything is working correctly, pull the battery out, and put your mouse back together! You now have hopefully another few years of use out of your G7.

Please feel free to ask questions or leave suggestions if you perform this same surgery on your G7 or similar mouse.
No comments:
Post a Comment